
Lighting Angles: McCandless, Broadcast and Beyond
I’m starting a series of blog posts here to put in print many of the common questions I find myself answering, particularly among church media personnel. While I have not personally been employed by a church in quite some time, I am very happy to return my experience from the professional world back into the church so that they may more effectively create environments for connecting with their congregations.
One of my maxims about lighting, and media in general, is that it must work before it can play. Having the proper angles for the lighting setup on your stages can aid in maximum visibility, reduce distractions from shadows and at most allow for sculpting mood onto the faces of those being lit. We’re going to look at some of the basic starting points here, but at the end of the day there are several aesthetic choices balanced with budgetary and infrastructure limitations that drive us toward our final product.
McCandless and the Basic Three Points
Stanley McCandless was an innovator in the early days when theaters were adopting electric lighting systems with regularized instruments. His 1932 textbook, A Method of Lighting the Stage, not only set him up as the doyen of American theatrical lighting, through whom many theatrical acts judged their productions. It also set the tone for how lighting would be done in the following decades along with setting up the expectation of how theatrical lighting should look. Lighting in McCandless’s model is what theatrical lighting has been come to feel like in an almost instinctual sense.
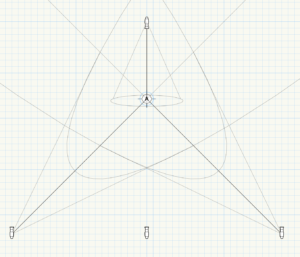
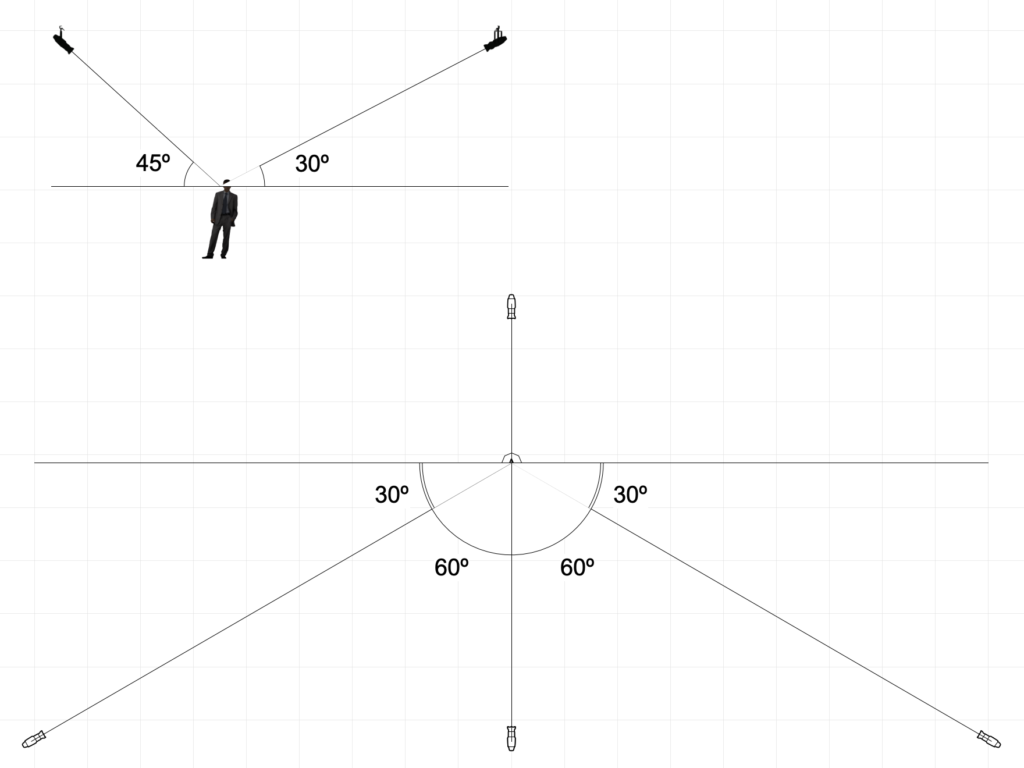
There were essentially three points to McCandless’s method. The first two were 45º up and each were 45º to each side. Stand on the stage where you want you’re lights to hit and stick both of your hands out forward together. Raise the 45º and then send each hand 45º outward, creating a right angle between them. This is where the Mccandless method would have you put lights.
McCandless and his disciples would gel the lights differently on each side. Slightly warm on one side and slightly cool on the other. This was great for an economy of balancing the colors (cut off all of the warm sides for a cool night scene), but this is beyond our scope for the day. The chief goal of this lighting was to exaggerate the dimensionality of the subject, often called modeling, which McCandless called, “plasticity.” “Plasticity is best achieved when the direction of light is at 45º in plan and elevation along the diagonal drawn between the extreme corners of a cube [the shape he used as a model].” (McCandless 1932, p.55)
For backlight, the exact angle is not as clear. McCandless noted that consideration must be taken to conceal the instruments from audience view. So, his consistent reference to toplight is to be considered pretty much that, coming from 90º from the horizontal. Today we might call this a god spot (Think of the opening sequence of Mr. Bean). This could even be as much as 60º from horizontal.
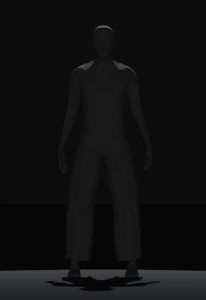
45º Backlight 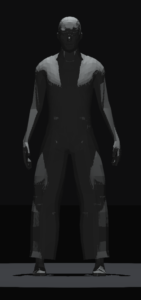
90º Backlight, i.e. a God Spot
However, aesthetics have changed and seeing the fixtures isn’t as taboo nowadays. In many cases, seeing the fixtures is part of the design. So, we might consider an angle more appropriate to the function of the backlight insofar as it creates separation between the subject and the background. Just note that when color is used in the backlight, the steeper the angle, the more visible, albeit unnaturally, the color. I prefer 45º up to 60º, just enough to have a little rim on the hair and along the shoulders.
McCandless did not account for lighting directly from the front. Part of his reasoning was not only the aesthetic choice of enhancing the dimensionality of subjects for the audience since front lighting tends to make the subject appear flat. There was also the technical limitation that theaters in his day did not as commonly have electrical positions available so far back in the theater to provide those angles.
Beyond McCandless into Broadcast
In the age of broadcast, when the camera can get you as close to the subject as needed for visibility, using lighting to accentuate the subject’s face is not as necessary. The point of exaggerating the shadows on an actor’s face to convey emotion over long distances means less when emotion can be so clearly seen already. Additionally, the eyes of the camera are nowhere near as good as our own. Cameras need a little help in smoothing over the difference between light and darkness. Cameras accentuate the contrast between light and darkness and adjusting the angles of lighting can help out.
Whereas McCandless would’ve suggested a 45º angle from horizontal, for the camera we will generally want an angle closer to 30º. This helps considerably with the shadows under the eyes. Take note that these angles are to eye level and not the floor. The eyes are how we connect our subject to the audience. Some take this shallow angle even further, like Bob Barnhart, who has produced most of the recent Super Bowl Half-time shows, Oscars and many other broadcast events. He’s so committed to the ideal angle for spotlights being 22.5º (half of 45º) that he named his company 22º.
The tradeoff is that shallower angles require more negative space behind the subject for distracting shadows to fall. But this leads to another of my maxims. If you light it well for the eye, it might look good for the camera. However, if you light it well for the camera, it will almost always look good to the eye. Think of the camera as an unforgiving eye.
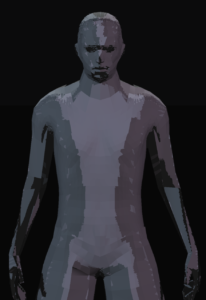
The key here is direct front light. This can either be done alone or in conjunction with sidelights. If front light alone is used, there can be some harsh transitions from the from to back light that could look unnatural, especially if you take cut shots from off the centerline.
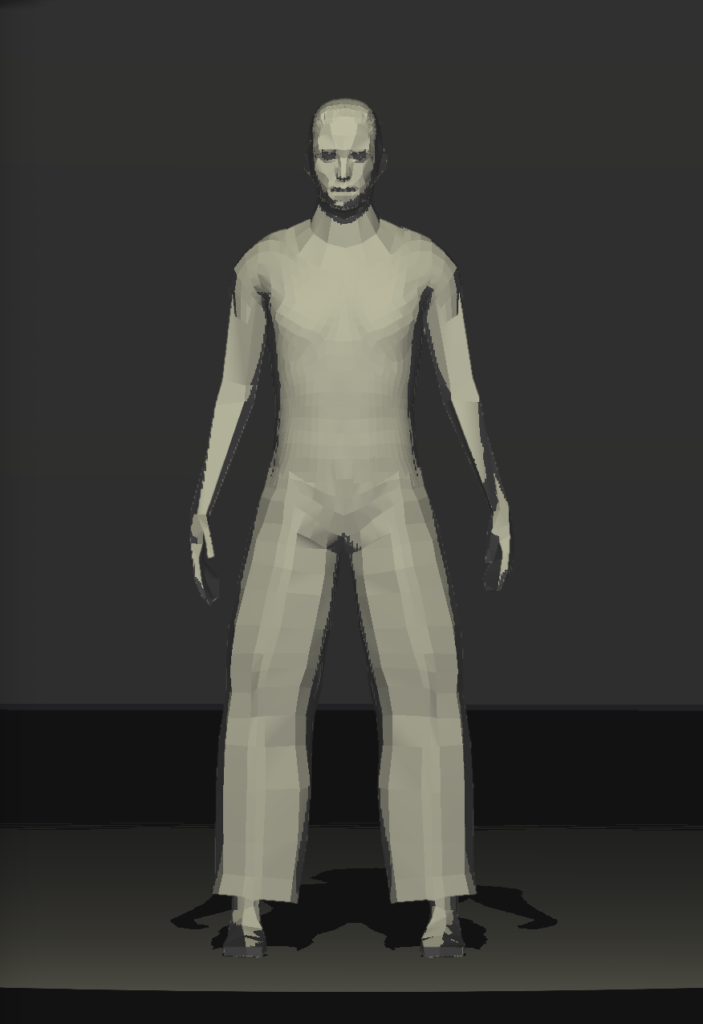
Front Only 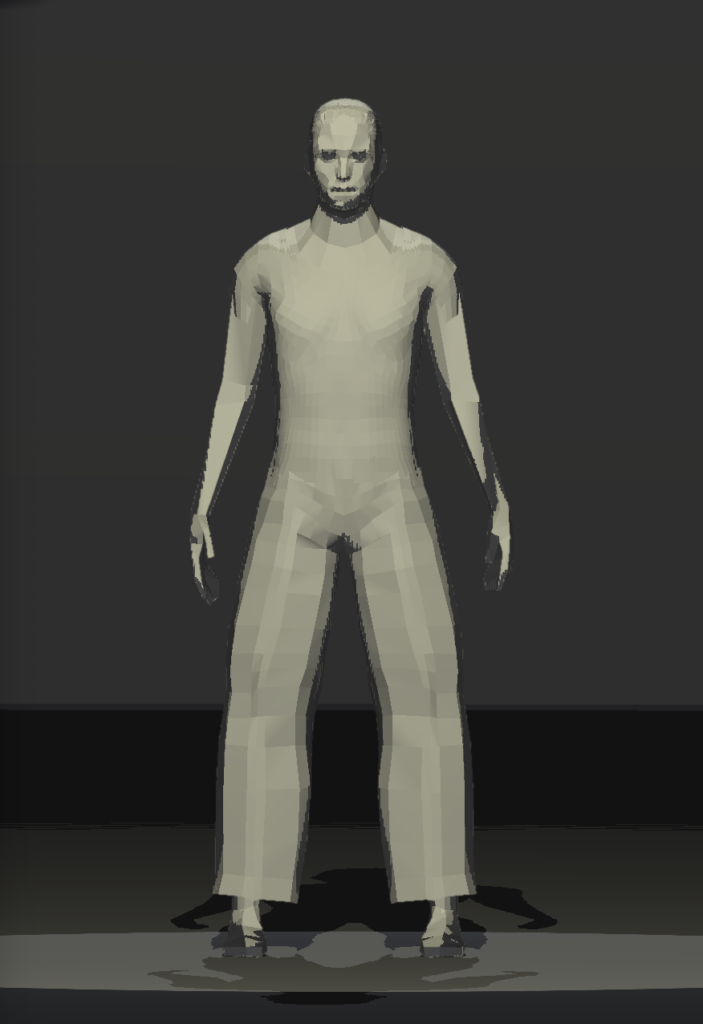
Front and Back
Adding sidelight helps in several ways if budgets allow. They have a key purpose in smoothing out the transition between the from and backlight but also help with some of the shadows created by the front light.. Think of a speaker at a podium with a gooseneck mic. The sidelights might not fully eliminate the shadow, but they can decrease the contrast. The trick is to not let the sidelights create shadows on their own. I’ve seen some that were so near the centerline that there were three mic shadows on the speakers chest.

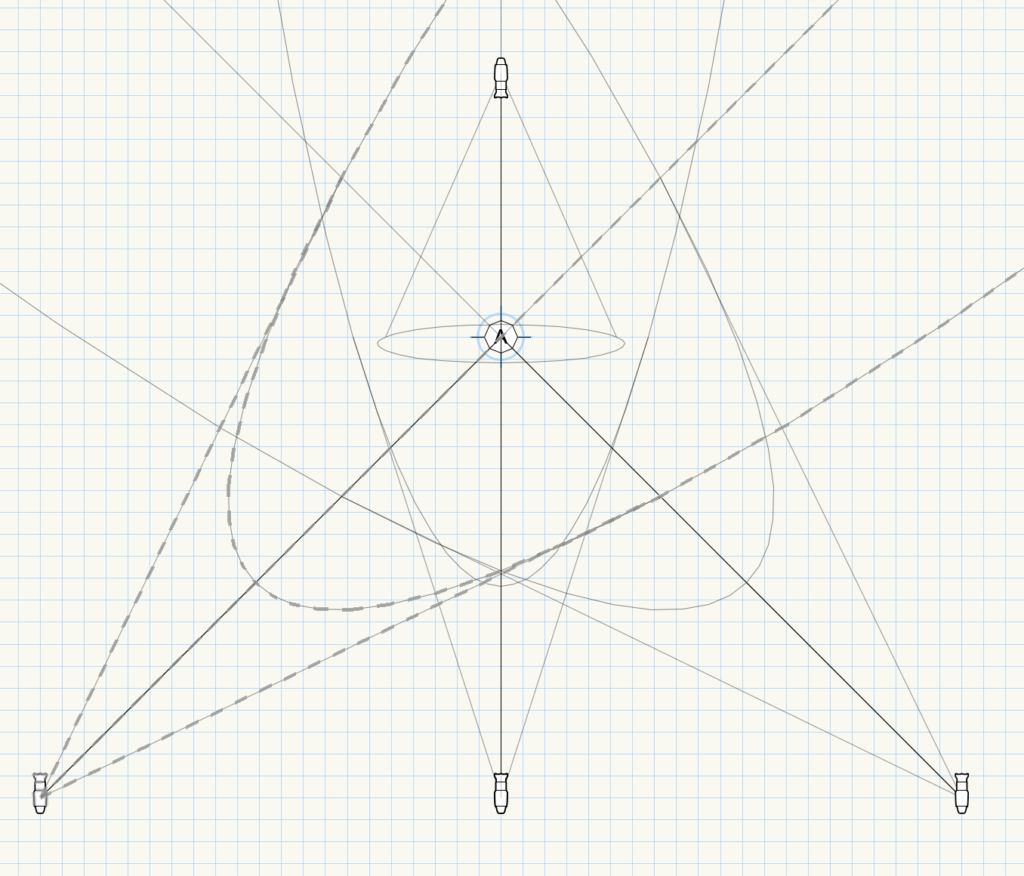
One side 60º, exaggerated for clarity 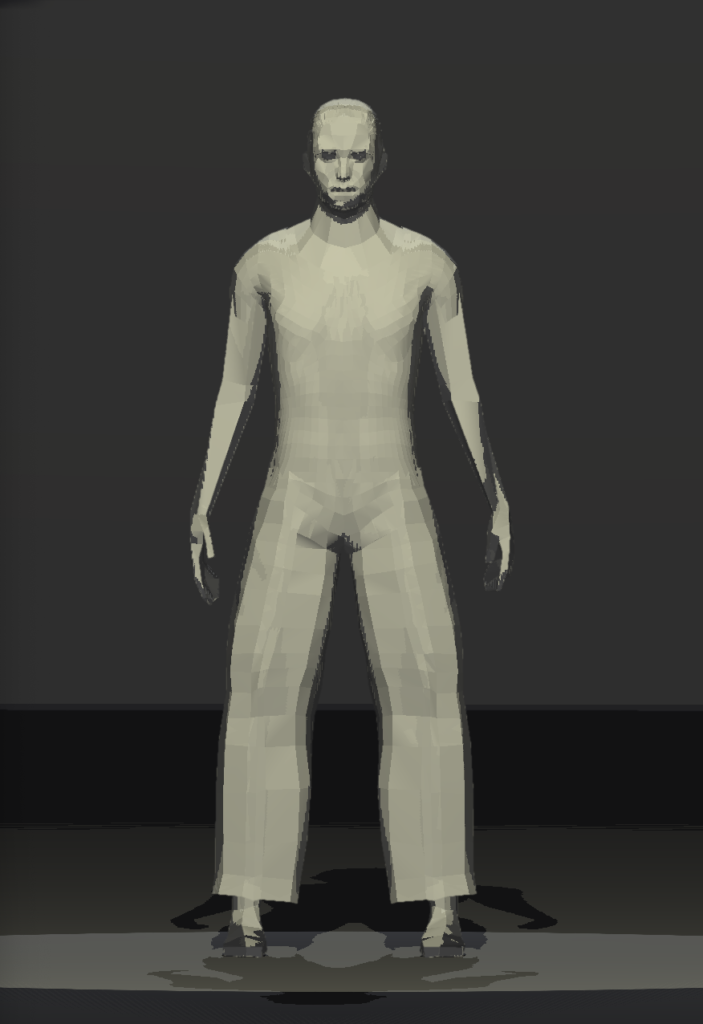
Both sides 60º 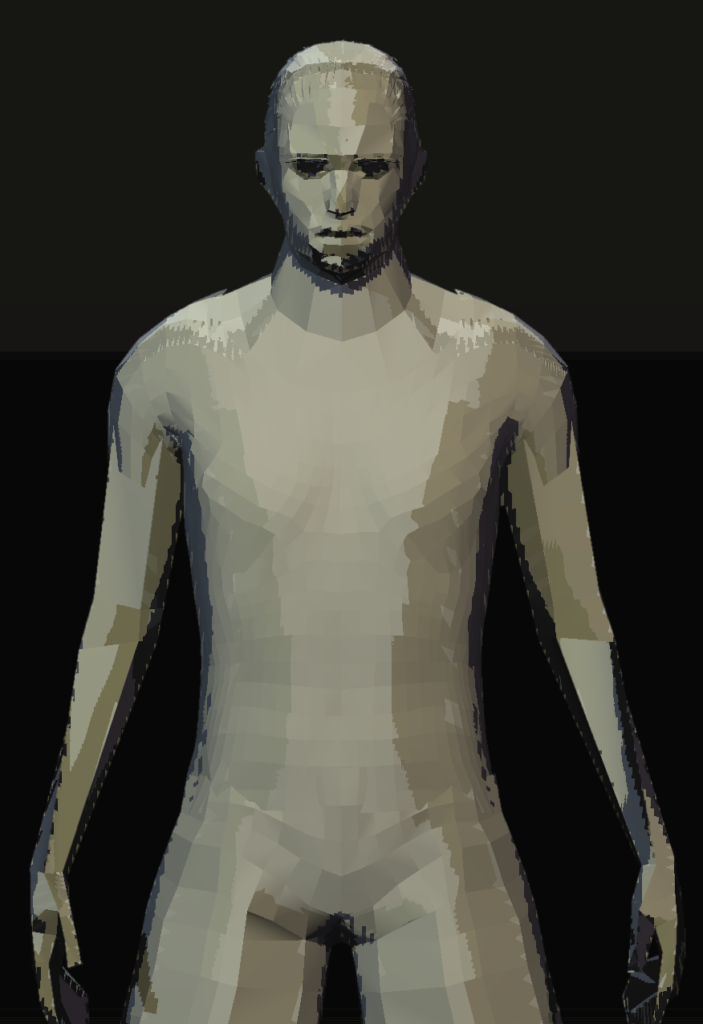
Both sides 45º in McCandless colors with fill from the front
In the illustration above, two of the pictures have the side lights at 60º from the centerline (120º from each other) and the other has the light at 45º. The last on is essentially the McCandless method with some front fill added. This technique would be useful for adding front fill when filming a theatrical production without entirely sacrificing the original look. The 45º angle side lights when used as fills rather than keys can create unwanted shadows like those discussed above. Moving them to 60º can allow those shadows to fall past the body. However, this means adding infrastructure much wider than simpler setups.
Side fills 45º off center 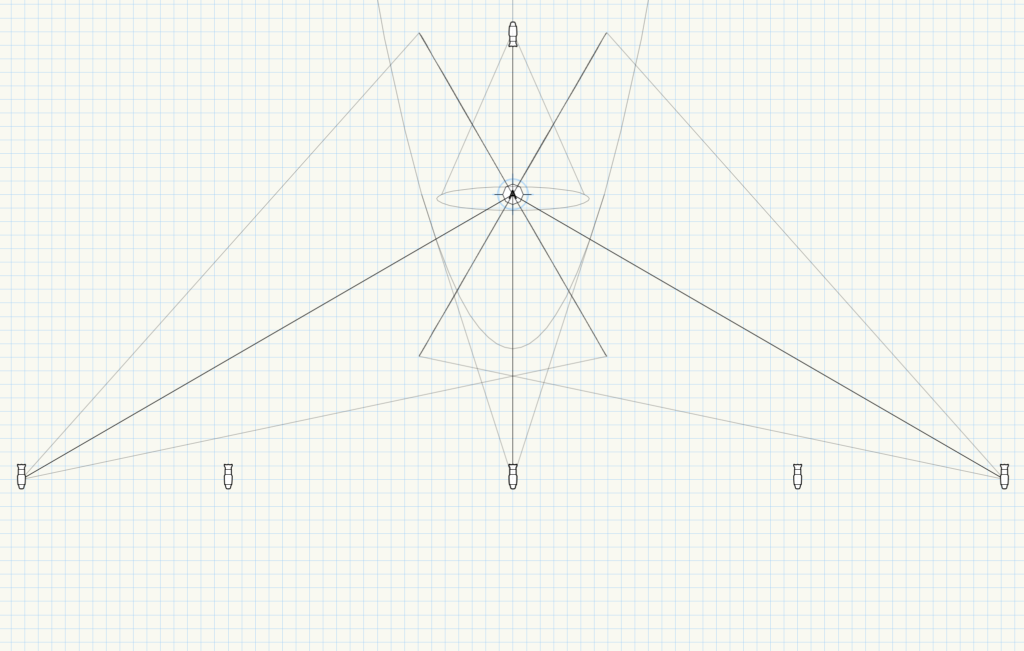
Side fills 60º off center
When using white light, either the front can be the key light with the sides acting as fills or the sides can be key while the front is a fill. The former has more of a broadcast looks while the latter might have a more theatrical feel. It’s subtle, but simply changing intensity levels can give a mood shift. My default is to use the sides as a fill. One great advantage of this system is that you can use the side fills to impart color without making the subject look unnatural. The color is an accent.
A little color added to each side 
More strongly, one color for the sides and another from the back
Beyond Functional Lighting Angles
So much more could be said about using lighting angles for both functional and dramatic effect. Sometimes I like having some torm positions (a loosely defined position, but one could say about 75º off center, nearly perpendicular to the centerline) or sidelights to get highly contrasted modeling, especially in music. Understanding the backgrounds to these angles can help us craft a purely functional feel or a more theatrical mood. We have a lot of tools in our angle tool chest.
At this point there are a lot of options, and even more exist beyond this. One LD I know often lit a speaker who paced back and forth in a camera setup that included extreme cut shots almost 90º from the center as well as cross-axis shots. In that setup he added two more points about 120º off the centerline, mirroring the side fills from the rear. He called these, “shadenators,” because they caught that last little bit of shadow seen by those cameras when the speaker’s face was turned. Effectively, that LD had a ring of lights around the speaker at 60º locations.
However, budgets rarely allow us to have six lights per zone. I’ve been in too many situations where I don’t have the budget for back light. Or maybe the rigging positions won’t allow you to get you side fills at the angle you’d like. Budget, venue, rigging and more restrictions determine that we must used these above ideals to get creative to hang our lights in just the right place.
If I have my choice, on most gigs I’ll have front light at 30º-45º to the face with to side fill positions 45º-60º off the center where I can play with color. Of course a backlight is crucial at 45º-60º from horizontal. Sometimes budgets allow for two front lights per zone. Sometimes I’ll put up just the two side lights. Others times I’ll put up two front lights with a little bit of separation, maybe 15º, between the two. It usually comes down to other factors. Often I’m only afforded the budget for one front light per zone and the choice is pretty clear. But the important thing is that this is scaleable and we can always build up to the ideal.
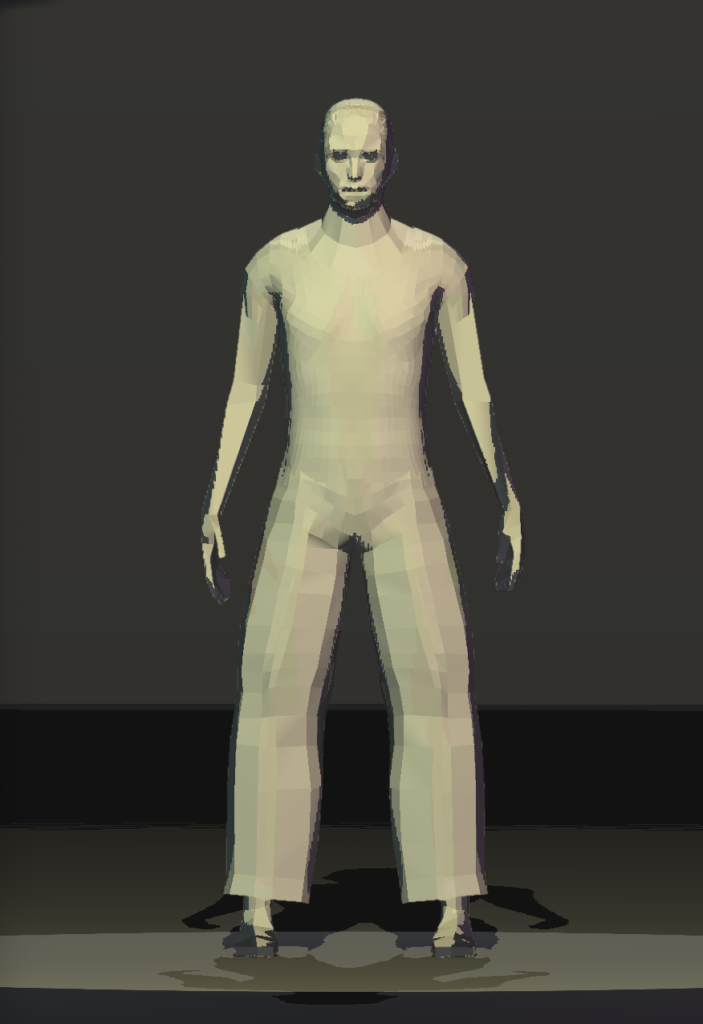
Modeling done in Chamsys MagicVis and plots drawn in Vectorworks 2020